Provision a host
:::note Placeholder page Screenshots below are real captures from a running centre; the step-by-step wording around them is still being checked against the console's exact button labels. :::
Once the agent is installed and the host appears in the centre's inventory, it has no desired state yet — Ballast never invents intent, so a freshly-registered host sits idle until you give it something to enforce.
1. Confirm inventory
Open the host's detail page in the console and check that its reported
physical adapters match what you expect. This is the agent's HostInventory
report; if an adapter is missing, confirm the agent process has permission to
enumerate it before going further.
2. Declare a virtual switch and management vNIC
Author a VirtualSwitchSpec for a SET-teamed (Switch Embedded Teaming)
external vSwitch over the physical adapters you want to bond, and a
ManagementVNICSpec for the vNIC the host itself will use — VLAN, IP
configuration and MTU all live here. SET is switch-independent only — there
is no dependent-mode teaming under a vSwitch, and legacy LBFO teams are not
modelled.
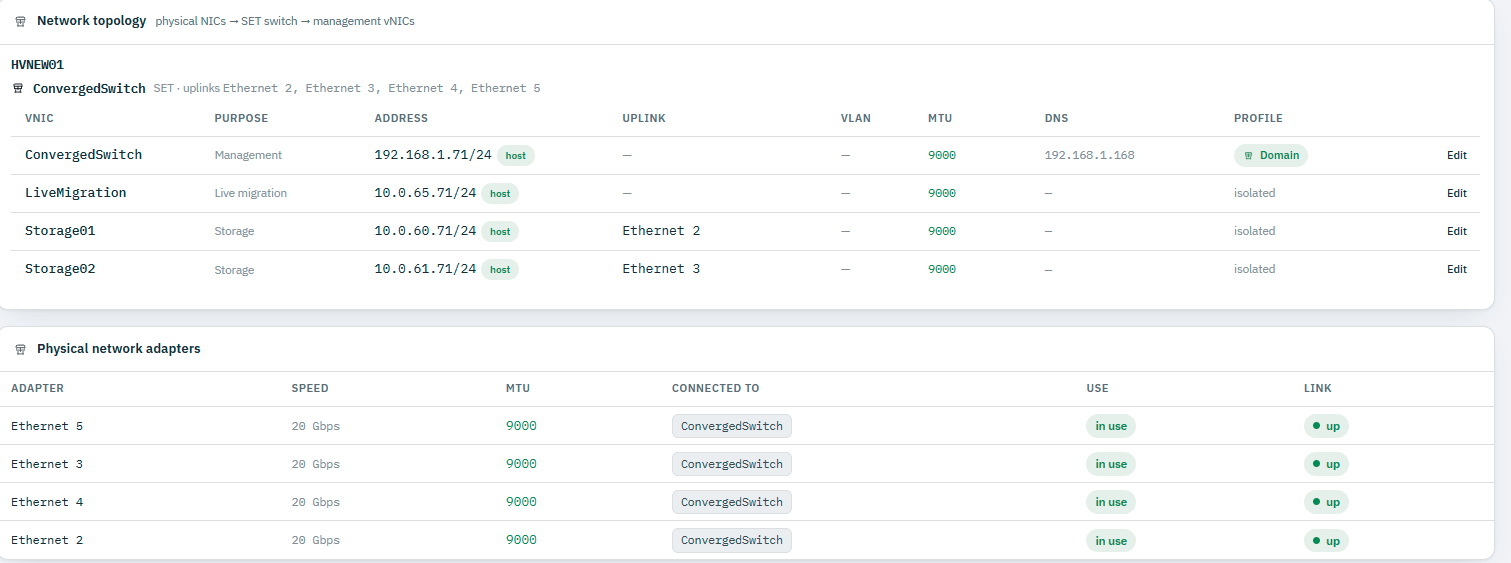
The console's networking tab lays this out exactly as it's modelled: physical NICs → SET switch → management vNICs, each vNIC showing its purpose (management, live migration, storage), address, uplink, VLAN and MTU.
3. Apply and watch it reconcile
Once desired state is saved, the agent's reconcile loop picks it up on its
next pull, creates the switch and vNIC via the underlying PowerShell modules,
and reports Status.ObservedGeneration catching up to the desired
Generation. Reapplying the same spec is always a no-op — reconciliation is
idempotent by design.
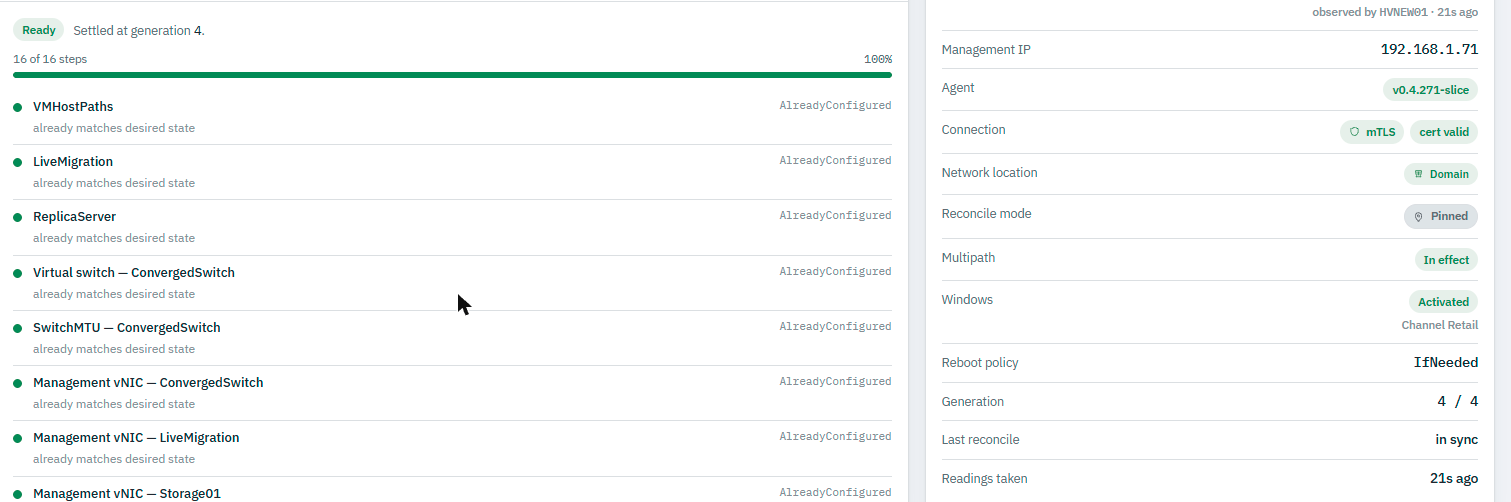
A settled host shows every reconcile step as AlreadyConfigured, its
generation counter caught up, and its agent's mTLS certificate status — not a
generic "healthy" flag standing in for all of that.
Interactive console
Every host also has an interactive console reachable from the centre — no RDP client to install, no route needed from your machine to the host itself:
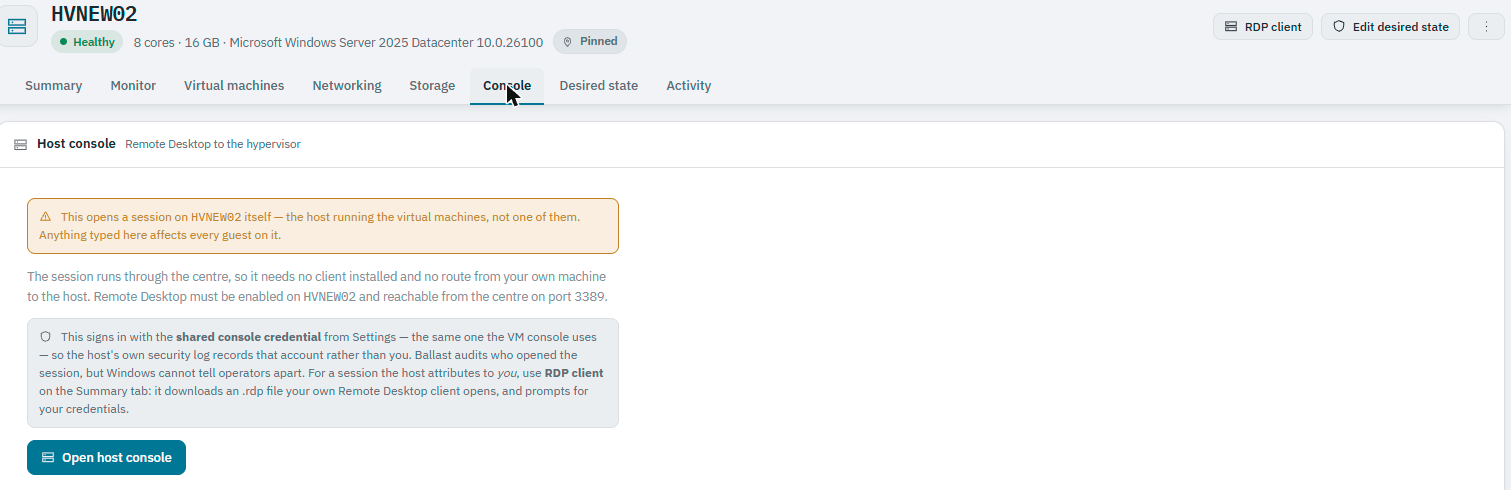
This is deliberately called out as a host console, not a VM console: a
session here reaches the hypervisor itself, so anything typed affects every
guest running on it. Where a session needs to be attributable to the person
opening it rather than a shared credential, the RDP client action on the
host's Summary tab downloads an .rdp file for your own Remote Desktop
client instead, prompting for your own credentials.
Each VM has its own, separate interactive console, reachable the same way from its own detail page.
Next
Continue to Join a cluster if this host is one of several forming a failover cluster, or stop here for a standalone host.